 | Fuser Unit |
|
 Handling precautions Handling precautions
Replacing the fuser unit
Always observe the following handling precautions when replacing the consumable products.
Do not touch the surface of the consumable product. Doing so may impair print quality.
 |
Warning: |
 Top Top
Follow the steps below to replace the fuser unit.
 |
Turn off the printer, and wait for 30 minutes until the temperature has subsided.
|
 |
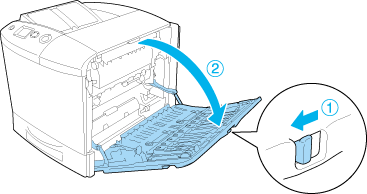
Push the latch on cover A to the left and open the cover.
|
 |
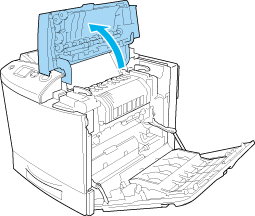
Open cover B.
|
 |
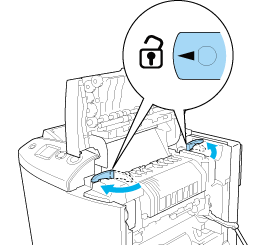
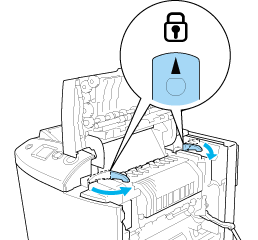
Turn the handles on both side of the fuser unit to unlock them.
|
 |
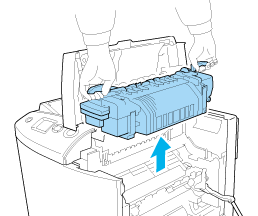
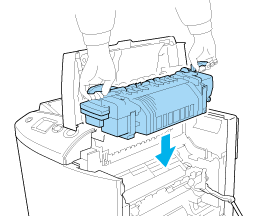
Lift the fuser unit out of the printer as shown below.
|
 |
Take the new fuser unit out of its package and remove the protective cover.
|

 |
Hold the new fuser unit by the handles and lower it into the printer making sure that the guide posts slide into the holes on the bottom of the unit.
|
 |
Turn the handles on both sides of the fuser unit to lock them.
|
 |  |
Note: |
| |
|
Make sure that the locks are completely in the locked position.
|
|
 |
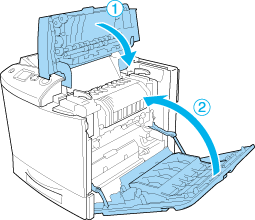
Close covers B and A.
|
Top
|