 |
 | Photoconductor Unit |
|
 Handling precautions Handling precautions
Replacing the photoconductor unit
Always observe the following handling precautions when replacing the consumable products:
-
To get the best print quality, do not store the photoconductor unit in an area subject to direct sunlight, dust, salty air, or corrosive gases (such as ammonia). Avoid locations subject to extreme or rapid changes in temperature or humidity.
-
When storing the photoconductor unit, make sure to attach the protective cover to the photoconductor unit and put it in the sealed blackout package and the box in which the photoconductor unit was sold, and store it in a safe level place.
 |
Warning: |
 Top Top
| Replacing the photoconductor unit |
Follow the steps below to replace the photoconductor unit, the waste toner collector, and the filter.
 |
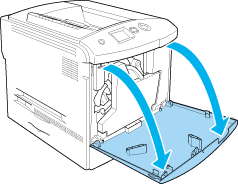
Open cover D.
|
 |
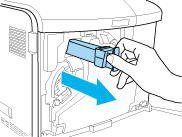
Remove the filter from the printer.
|
 |
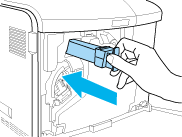
Take the new filter out of its package. Insert the new filter to the printer.
|
 |
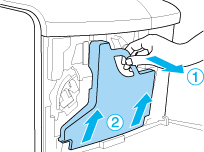
Remove the waste toner collector.
|
 |
Take the cap off and cover the hole for the waste toner collector with it.
|
|  |
Note: |
| |
|
If you need to set the waste toner collector down, place it on a flat surface with the capped side facing up to prevent the toner content from spilling out.
|
|
 |
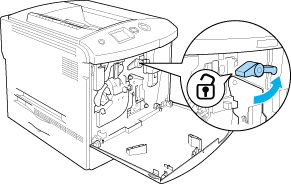
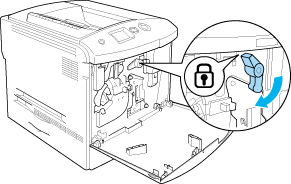
Turn the blue knob on the front of the photoconductor as shown below.
|
 |
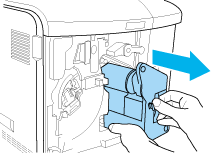
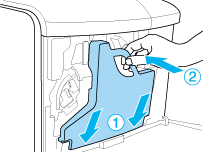
Hold the handle of the photoconductor unit and pull it toward you to remove the photoconductor unit form the printer.
|
 |
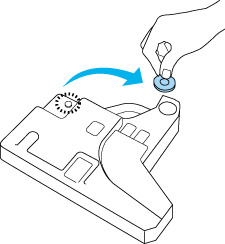
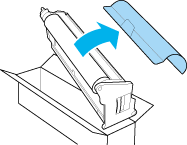
Take the new photoconductor unit out of its package and remove the protective cover.
|
|  |
Caution: |
| |
|
Do not touch the belt on the top of the unit or the green photo conductor area. Otherwise, the print quality may decrease.
|
|
 |
Hold the photoconductor unit by its handle and insert the unit into the printer.
|

 |
Turn the blue knob back to the original position.
|
 |
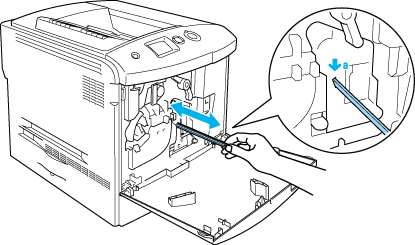
Hold the cleaning knob [a] and move it slowly in and out a few times.
|
 |
Insert the new waste toner collector into the printer.
|
 |
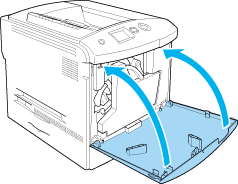
Close cover D.
|
Top
| |