![]()
Reference Guide
|
|
Index |
|
Search |
|
Glossary | |||||
|
|
Contents |
|
Help |
|
||||||
|
|
|
|||||||||||||||||||||||||||||||||
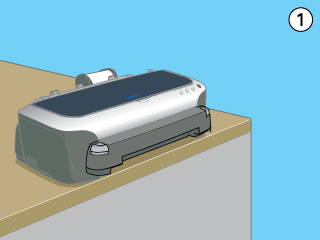
How To / Using the Optional Automatic Roll Paper Cutter
Remove the cutter as the following steps.
 | Caution: |
| Be sure to turn the printer off for safety reasons when removing the cutter from the printer. |
Holding down the buttons on both ends of the cutter, pull the cutter toward you and remove it.
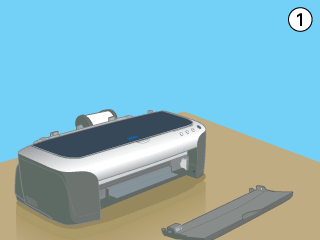
To attach the output tray again, follow the instructions below.
 | Join the hole that is on the right of the output tray and the prong that is on the right of the sheet feeder. |
 | Press the lever that is on the left side of the output tray to the right. |
 | Leaning the output tray, then insert the prong that is on the left of the output tray into the slot on the left of the sheet feeder. |
 Previous |
 Next |
| Version 1.20E, Copyright © 2004, SEIKO EPSON CORPORATION |