|

Reference Guide
|
|
How To / Paper Handling
Loading Special Paper and Other Media
You can achieve good results with most types of plain bond paper. However, using coated paper results in higher quality printouts because these media absorb smaller amounts of ink.
EPSON provides special media that are formulated for the ink used in EPSON ink jet printers. EPSON recommends using media distributed by EPSON to ensure high-quality results. See EPSON special media for a complete list of these products.
When loading special media distributed by EPSON, read the instruction sheets packed with the media first and keep the following points in mind.
-
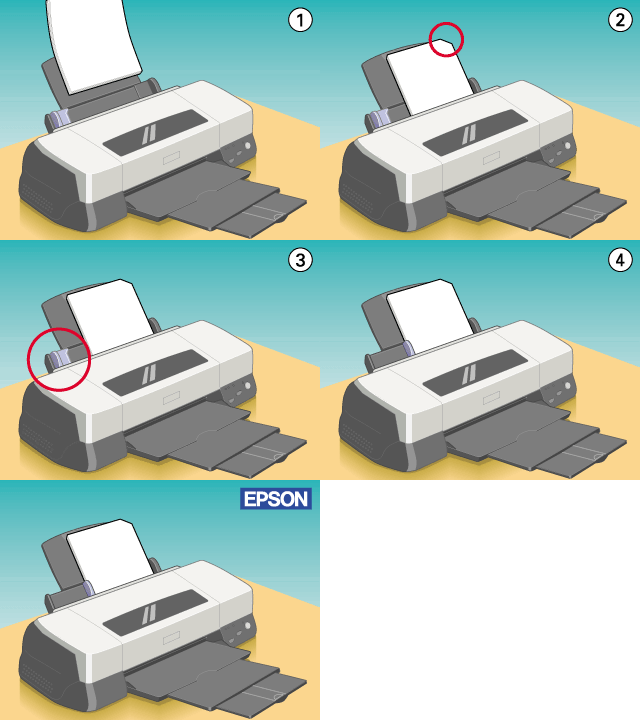
Make sure the printable side of the paper is facing up when loading media into the sheet feeder. See the instruction sheets packed with the media to determine which side is the printable surface. Some media have cut corners to help identify the correct loading direction, as shown in the illustration.

 |  |
Note:
|
 |  |
If you extend the printable area by selecting Maximum as the Printable Area setting in the printer driver, the cut corner on special paper may mar your printout.
|
-
Make sure the paper stack fits under the arrow mark located on the inside surface of the left edge guide.
-
The loading capacity for EPSON special media is explained below.
|
Glossy Paper - Photo Weight
|
One sheet at a time.
|
|
Archival Matte Paper
|
One sheet at a time. Up to 20 sheets at a time for A4 size paper.
|
|
Premium Semigloss Photo Paper
|
One sheet at a time.
|
-
If the paper is curled, make sure to flatten it or curl it slightly toward the opposite side before loading. Printing on curled paper may smear your printout, especially when printing with Maximum selected as the Printable Area setting.

-
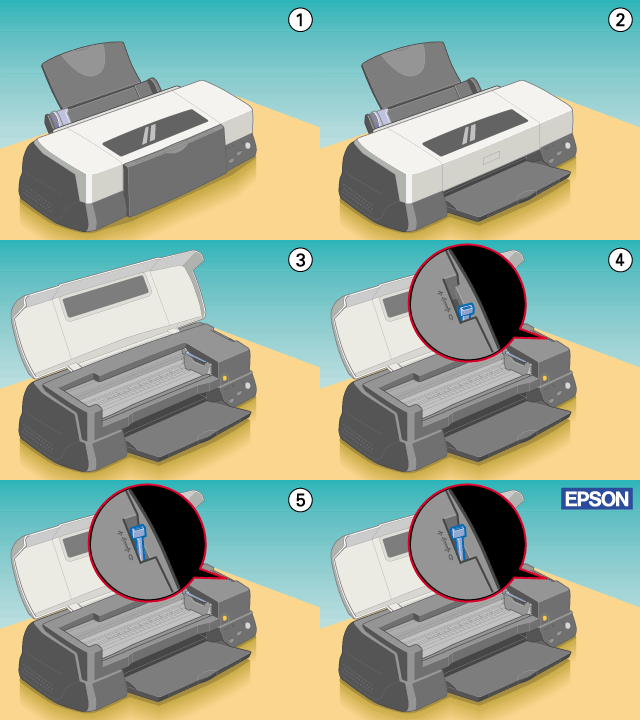
If ink smears on your documents when printing on thick media, set the adjust lever to the "+" position. To change the setting, open the printer cover and position the lever as shown in the illustration.

 |  |
Note:
|
 |  | -
Return the adjust lever to the "0" position before printing on media of normal thickness. Leaving the lever in the "+" position may cause gaps in the printed image.
|
 |  | -
When the adjust lever is in the "+" position, make sure the High Speed setting in the printer driver's Advanced dialog box is off. To turn this option off, you may also need to change the Print Quality setting or align the print head using the Print Head Alignment utility.
|

[Top]
| Version 1.00E, Copyright © 2002, SEIKO EPSON CORPORATION |