|

Reference Guide
|
|
Problem Solver
Running a printer operation check
Performing a printer operation check can help you determine whether the problem comes from the printer or the computer.
To print a printer operation check page, follow these steps.
 |
Make sure both the printer and computer are turned off.
|
 |
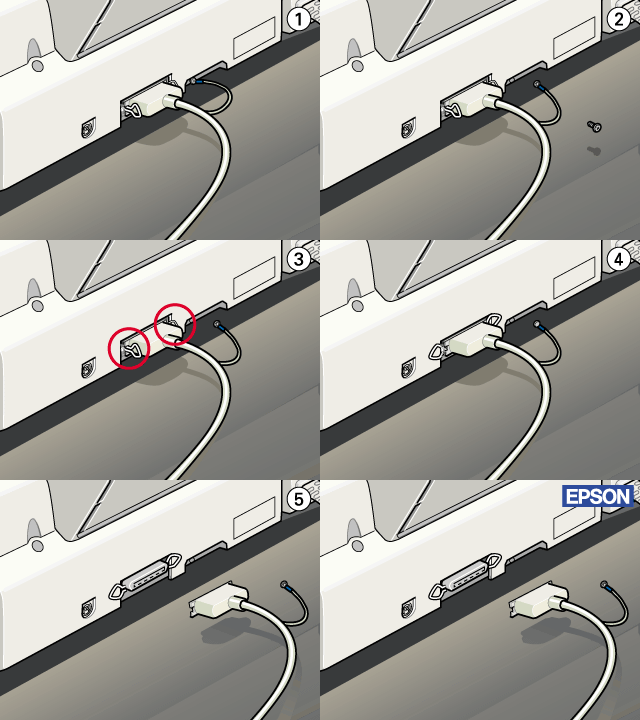
Disconnect the cable from the printer's interface connector.
|
If you use the parallel interface, unlock the wire clips on both sides of the interface connector and remove the ground connector, if necessary. Then disconnect the cable from the printer's interface connector.

 |
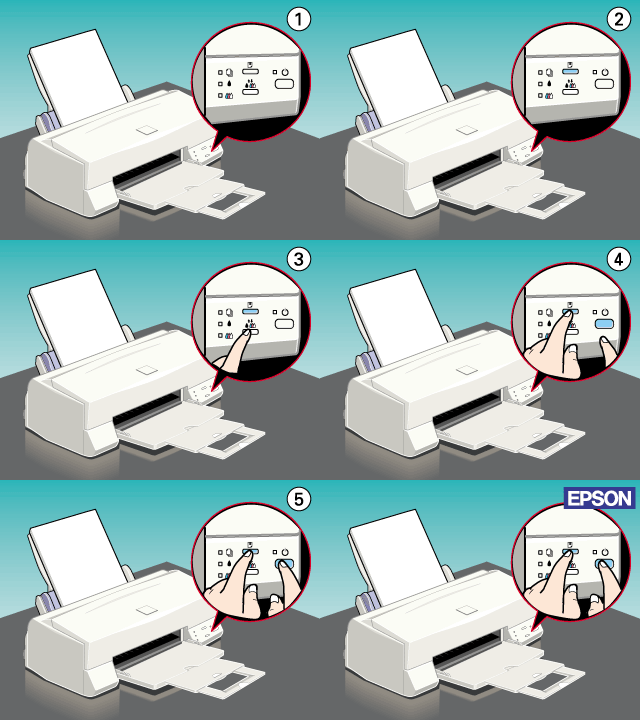
Make sure that A4 or Letter size paper is loaded in the sheet feeder.
|
 |
Hold down the  load/eject button and press the load/eject button and press the  power button to turn on the printer. Then release both buttons. power button to turn on the printer. Then release both buttons.
|

The printer prints an operation check page including the version of your printer's ROM, the ink counter code, and a nozzle check pattern.
-
Compare the quality of the printed check page with the sample shown below. If there are no print quality problems, such as gaps or missing segments in the test lines, the printer itself is all right and the problem probably lies in the printer software settings, application settings, the interface cable (be sure to use a shielded cable), or the computer itself.

-
If the check page does not print satisfactorily as shown below, there is a problem with the printer. For example, if any segment of the printed lines is missing, this could be a clogged ink nozzle or a misaligned print head.


[Top]
| Version 1.00E, Copyright © 2002, SEIKO EPSON CORPORATION |