 |
 |
|
||
 |
||||
Temporarily Printing with Black Ink When Color Ink Cartridges are Expended
When color ink is expended and black ink still remains, you can continue printing for a short time using only black ink. However, you should replace the expended ink cartridge(s) as soon as possible. See the following section to continue printing temporarily with black ink.
 Note:
Note:|
The actual amount of time will vary depending on the usage conditions, images printed, print settings, and frequency of use.
|
For Windows
Follow the steps below to continue printing temporarily with black ink.
 |
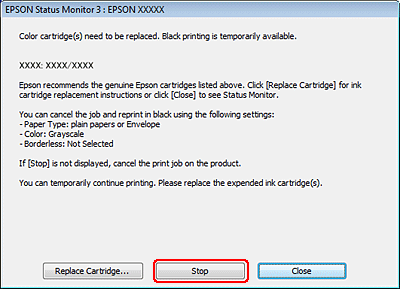
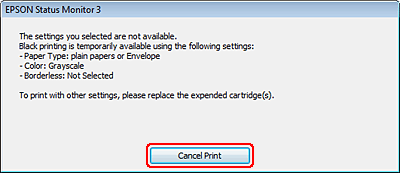
When EPSON Status Monitor 3 tells you to cancel your print job, click Stop or Cancel Print to cancel your print job.
|


 Note:
Note:|
If the error stating that a color ink cartridge is expended originates with another computer on the network, you may need to cancel the print job at the printer. If the printer is not equipped with an LCD screen, press the printer
 button for three seconds to cancel the print job. button for three seconds to cancel the print job. |
 |
Load plain paper or envelope.
|
 |
Access the printer settings.
|
 |
Click the Main tab, and make suitable settings.
|
 |
Select plain papers or Envelope as the Type setting.
|
 |
Select the Grayscale check box in Print Options.
|
 |
Click OK to close the printer settings window.
|
 |
Print your file.
|
 |
Epson Status Monitor 3 is displayed on your computer screen again. Click Print in Black to print with black ink.
|
For Mac OS X
Follow the steps below to continue printing temporarily with black ink.
 |
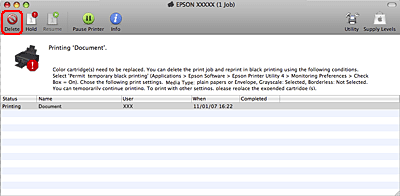
If printing can not be resumed, click the printer icon in the Dock. If an error message is displayed prompting you to cancel the print job, click Delete and follow the steps below to reprint the document with black ink.
|

 Note:
Note:|
If the error stating that a color ink cartridge is expended originates with another computer on the network, you may need to cancel the print job at the printer. If the printer is not equipped with an LCD screen, press the printer
 button for three seconds to cancel the print job. button for three seconds to cancel the print job. |
 |
Open System Preferences, click Print & Scan (Mac OS X 10.7) or Print & Fax (Mac OS X 10.6 or 10.5), and select the printer from the Printers list. Next, click Options & Supplies and then Driver.
|
 |
Select On for Permit temporary black printing.
|
 |
Load plain paper or envelope.
|
 |
Access the Print dialog box.
|
 |
Click the
 button to extend the dialog box. button to extend the dialog box. |
 |
Select the printer you are using as the Printer setting, and then make suitable settings.
|
 |
Select Print Settings from the pop-up menu.
|
 |
Select plain papers or Envelope as the Media Type setting.
|
 |
Select the Grayscale check box.
|
 |
Click Print to close the Print dialog box.
|
