|

Reference Guide
|
|
Setup & Maintenance / Installing Options
Hard Disk Drive
The optional Hard Disk Drive (C12C824061) allows you to expand the printer's input buffer when the Ethernet interface is used, and gives you additional memory for graphics, form data, and faster multi-page, multi-output printing.
Follow these steps to install the optional Hard Disk Drive.
 |
Warning:
|
 | |
Be careful when working inside the printer as some components are sharp and may cause injury.
|
|
 |
Caution:
|
| |
Before you install the Hard Disk Drive, be sure to discharge any static electricity by touching a grounded piece of metal. Otherwise, you may damage static-sensitive components.
|
|
 |
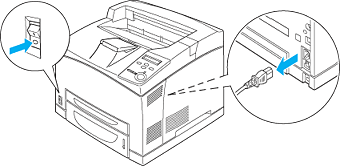
Turn the printer off and unplug the power cord and interface cable.
|
 |
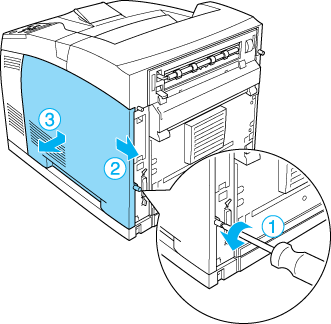
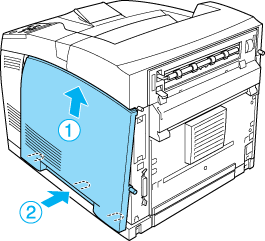
Remove the cover on the printer's right side by removing the screw on the back of the printer and sliding the cover backward.
|
 |
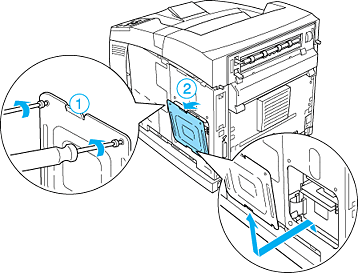
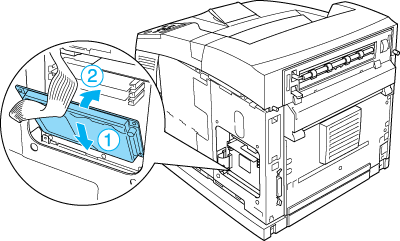
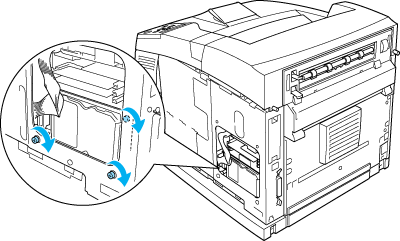
Loosen the two screws using a screwdriver. Then hold the tab on the top of the shield cover and remove the cover.
|
| |
Warning:
|
| | |
Removing other screws and covers will expose high voltage areas.
|
|
 |
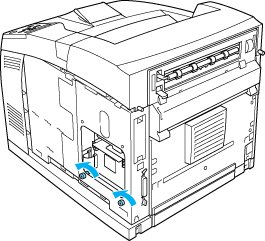
Identify the installation slots for the Hard Disk Drive.
|
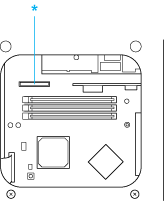
* Hard Disk Drive Socket
 |
Remove the two screws at the bottom of the printer.
|
 |
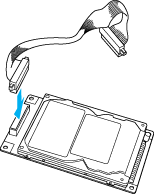
Connect one end of the cable that comes with the Hard Disk Drive to the socket on the Hard Disk Drive.
|
|  |
Note:
|
| | |
There are two cables included with the Hard Disk Drive. Use the longer cable.
|
|
 |
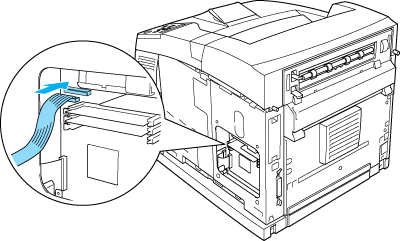
Connect the other end of the cable to the Hard Disk Drive socket on the circuit board.
|
 |
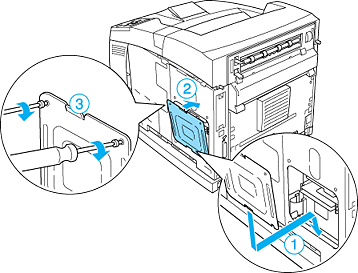
Insert the bottom side of the Hard Disk Drive into the printer and push it to set it in the correct position.
|
 |
Secure the drive with the screws. Use the screw that comes with the drive to secure the upper-right corner, then use the two screws that you removed in step 5 to secure the positions you took them out of.
|
| |
Caution:
|
| | -
Be careful not to damage the cable when tightening the screws.
|
|
| | -
Do not remove any modules from the circuit board. Otherwise, the printer will not work.
|
|
 |
Reattach the shield cover with two screws as shown below.
|
 |
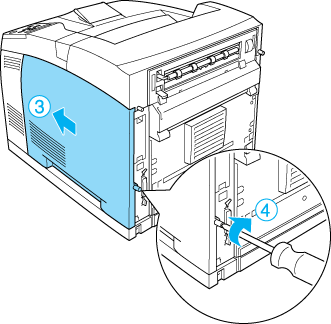
Reattach the right side cover to the printer as shown below. Then, tighten the screw on the back of the printer.
|
| |
Warning:
|
| | |
Tighten the screw firmly to prevent the printer's right side cover from the falling off when moving the printer.
|
|
 |
Reconnect the interface cable and power cord and turn the printer on.
|
To confirm that the option is installed correctly, print a status sheet. See Printing a Status Sheet.
|
Note:
|
| |
If you are using Windows, and EPSON Status Monitor 3 is not installed, you have to make settings manually in the printer driver. Click the Update the Printer Option Information Manually button on the Optional Settings menu, then click Settings. Then select the Optional HDD Unit check box on the Optional Settings dialog box and click OK.
|
|
Removing the Hard Disk Drive
Perform the installation procedure in reverse.
Formatting the Hard Disk Drive
To format the Hard Disk Drive, follow the instructions below.
|
|
Make sure the printer is off and all interface cables are disconnected.
|
|
|
Hold down the  button while you turn on the printer. button while you turn on the printer.
|
|
|
When you see the message Support Mode on the LCD panel, select HDD Format in the support menu.
|
|
Note:
|
| -
After formatting the Hard Disk Drive, the printer will automatically reboot.
|
|
| -
When you want to erase only the fonts installed from the Adobe PostScript 3 (PS3), follow steps 1 through 3 above. Select PS3 HDD Init.
|
|
| -
Other fonts installed from PS3 will also be erased.
|
|
| -
When installing a Hard Disk Drive from other products, format it with this function.
|
|

[Top]
| Version NPD0274-00, Copyright © 2003, SEIKO EPSON CORPORATION |

