|

Reference Guide
|
|
How To / Replacing Consumable Products
Transfer Unit
Prepare a new transfer unit for replacement when you get a message informing you to do so.
Handling precautions
Note the following handling precautions before replacing the transfer unit.
-
Do not touch the surface of the transfer unit. Doing so may impair print quality.
 |
Warning:
|
 | |
Keep the transfer unit out of the reach of children.
|
|
Replacing the transfer unit
Follow these steps to replace the transfer unit.
 |
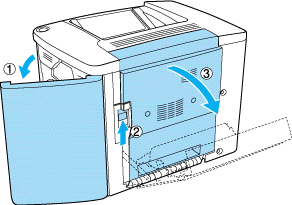
Open the front cover and Cover AB.
|
 |  |
Note:
|
 |  | |
You must open Cover AB to avoid the friction of the transfer unit.
|
|
 |
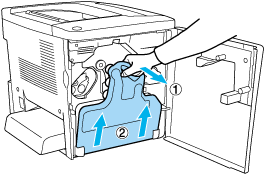
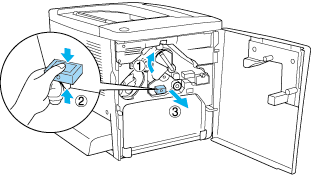
Take out the waste toner collector and the photoconductor unit.
|
 |
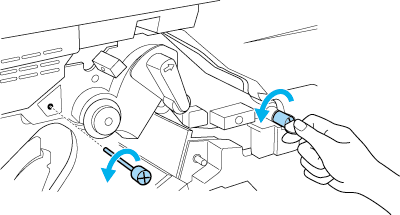
Remove the two screws on the transfer unit.
|
 |  |
Note:
|
 |  | |
You can use a screwdriver or a coin to remove the screws.
|
|
 |
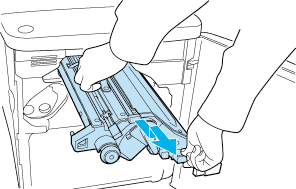
Take out the transfer unit by pulling the knob, holding the handle, and pulling the unit up.
|
 |
Take the new transfer unit out of its package.
|
 |
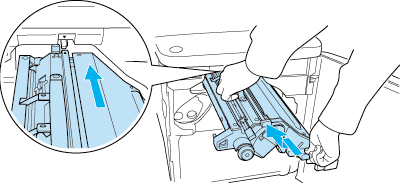
Insert the new transfer unit by aligning it with the arrow marks on the transfer unit and the printer.
|
 |  |
Note:
|
 |  | |
Tilt the transfer unit forward to install correctly.
|
|
 |
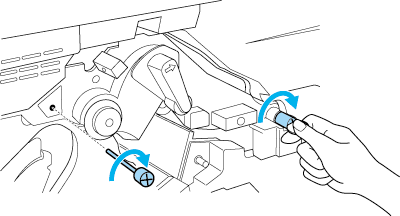
Tighten the two screws of the transfer unit you removed in step 3.
|
 |  |
Note:
|
 |  | |
Tighten the screws tightly with a screwdriver or a coin.
|
|
 |
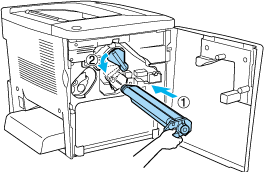
Reinstall the photoconductor unit.
|
 |
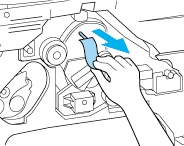
Remove the protective material as shown below.
|
 |
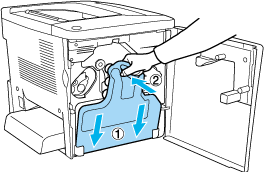
Reinstall the waste toner collector.
|
 |
Close the front cover and Cover AB.
|

[Top]
| Version 1.00E, Copyright © 2002, SEIKO EPSON CORPORATION |